How to Build a Browser Image Converter with Canvas API for Offline Multi-Format Conversion
Focus keyword: browser image converter with canvas api
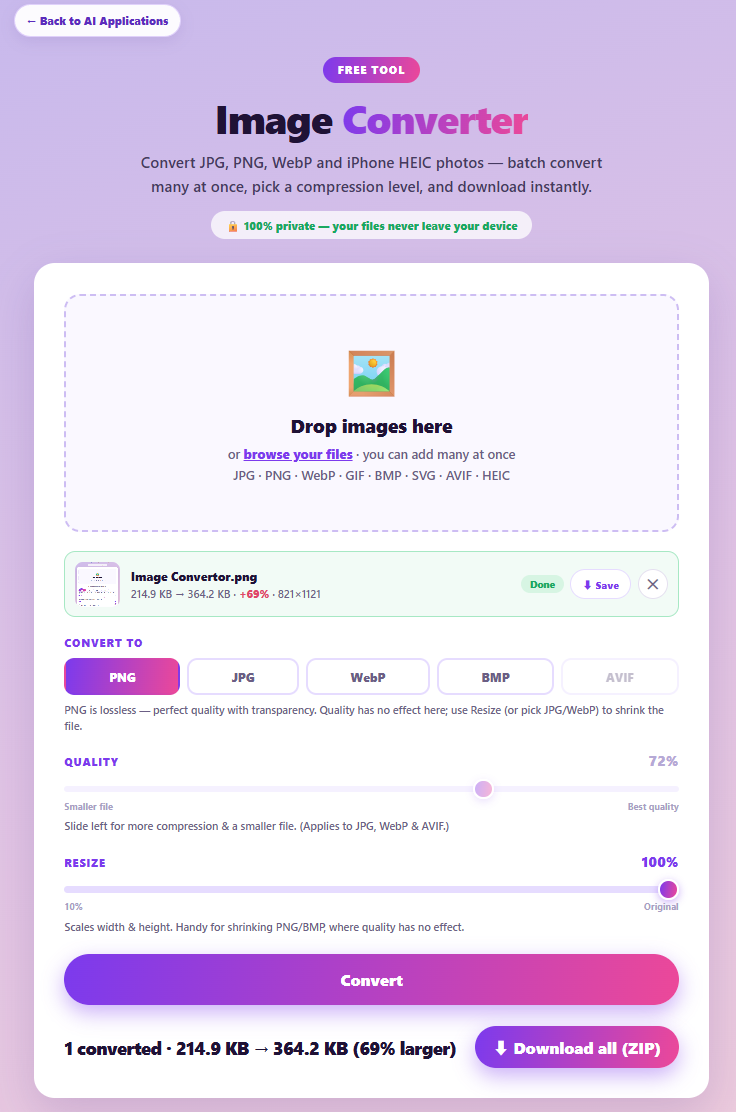
In this tutorial, you will build a fully functional browser image converter with Canvas API that runs entirely in the user’s browser—no server uploads, no backend infrastructure, and no privacy concerns. This tool converts images between formats (JPG, PNG, WebP, BMP, AVIF, HEIC), adjusts quality and dimensions, and downloads results instantly using only HTML5 and JavaScript.
By the end of this guide, you will have a working single-file image converter that performs client-side image conversion with drag-and-drop upload, format selection, quality control, and automatic downloads—all while remaining completely offline-capable and privacy-focused.
Find out Result ➡️ Free Browser Image Converter with canvas api (PNG2JPG, JPG2PNG)
What Is a Browser Image Converter with Canvas API
A browser image converter with Canvas API is a web application that performs image format conversion, resizing, and quality adjustment entirely within the user’s browser using native JavaScript APIs. Unlike traditional image converters that require uploading files to a server, this approach uses the Canvas API to decode, process, and encode images locally.
The converter leverages javascript canvas image processing to handle multiple image formats without external dependencies. It provides instant results, works offline, and ensures complete user privacy since files never leave the user’s device.
Common use cases include:
- Converting modern formats like AVIF or HEIC to widely-supported JPG or PNG for compatibility
- Reducing file sizes by adjusting quality settings before sharing images
- Resizing images for web uploads or social media without installing desktop software
- Processing sensitive images locally without uploading to third-party services
- Building privacy-focused tools for communities concerned about data security
Who This Tutorial Is For
- JavaScript developers who want to build browser-based image processing tools
- Indie hackers creating privacy-focused web applications without server costs
- No-code builders expanding their technical knowledge of client-side browser capabilities
- Developers with basic JavaScript knowledge and familiarity with HTML5 Canvas
- Anyone interested in building offline-capable web applications that respect user privacy
Technologies We’ll Use
- Canvas API — the core browser API for drawing, manipulating, and encoding images in multiple formats with quality control
- createImageBitmap — modern browser API that decodes images efficiently and handles EXIF rotation automatically without manual intervention
- toBlob method — Canvas API method that encodes canvas content into binary image data in specified formats (JPG, PNG, WebP)
- File API — browser API for handling local file selection and reading user-selected images without server upload
- URL.createObjectURL — browser method that creates temporary download links for converted images to trigger automatic downloads
Building the Browser Image Converter
We’ll build this converter through a systematic approach: planning features and design, establishing the core conversion pipeline, implementing the convert function with special format handling, and completing the download workflow.
Step 1: Feature Planning
Before writing code, define the complete feature set to ensure the converter meets practical needs. The core features include format support, user interface elements, and conversion options.
Plan support for six common image formats: JPG (universal compatibility), PNG (transparency support), WebP (modern compression), BMP (legacy compatibility), AVIF (next-generation format), and HEIC (Apple ecosystem). This coverage handles most real-world conversion scenarios.
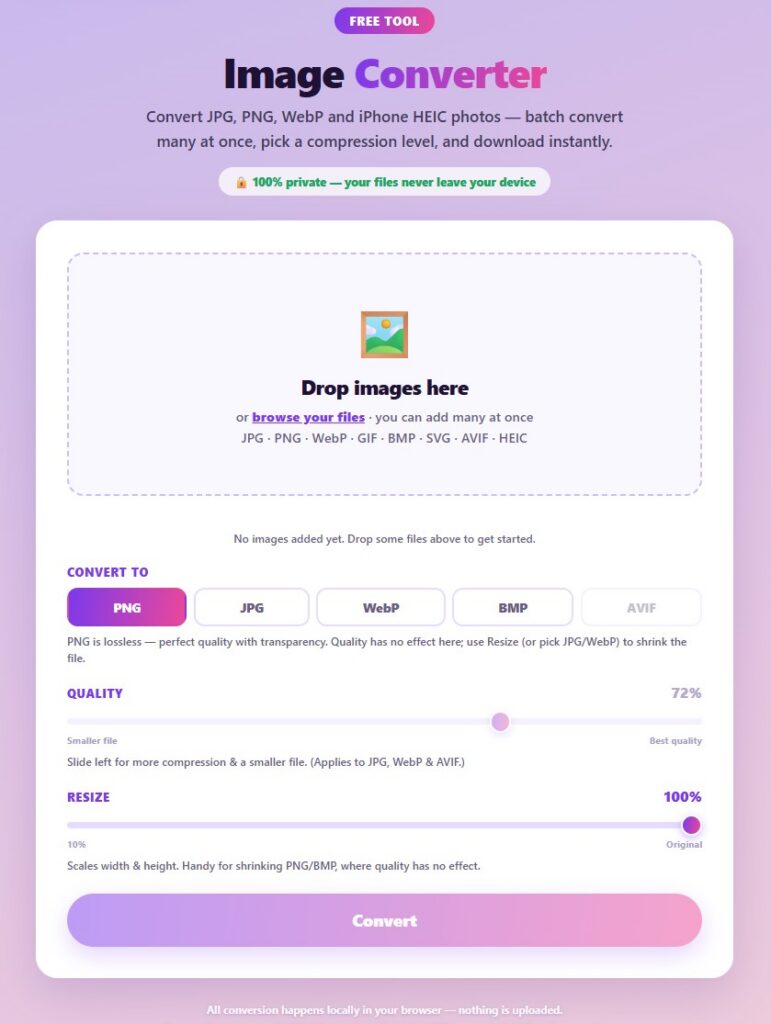
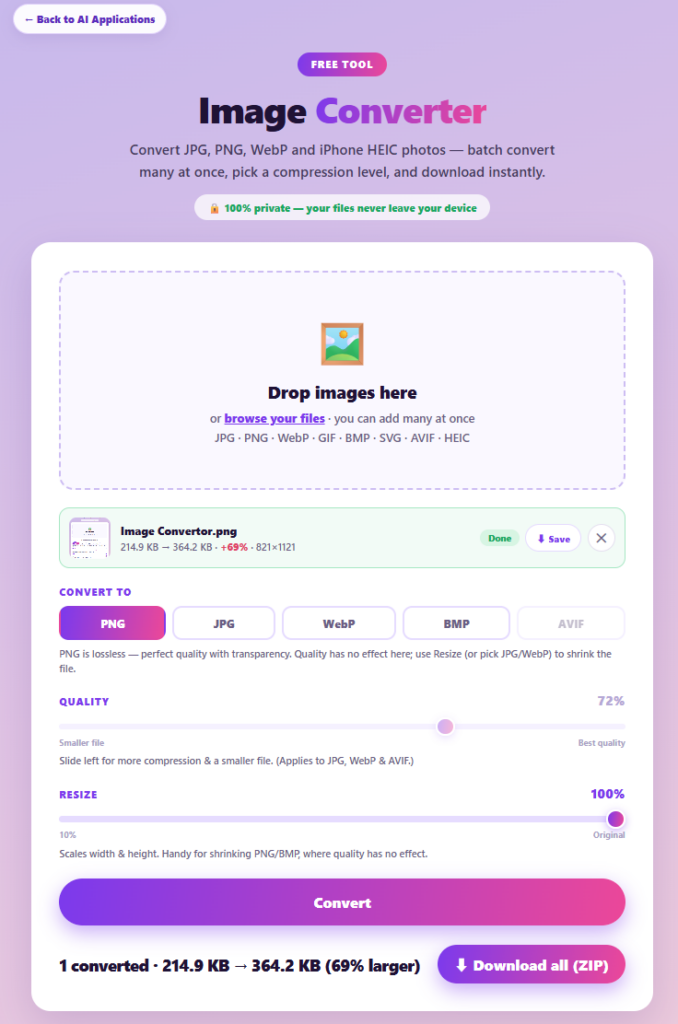
The user interface requires a drag-and-drop upload zone for intuitive file selection, quality sliders for compression control (0-100%), resize inputs for dimension adjustment, format selection dropdown, and a results list showing conversion status and download buttons. Batch conversion capability allows processing multiple images simultaneously for efficiency.
Each conversion displays the original filename, selected output format, file size comparison, and a download button. This feedback loop helps users understand compression trade-offs and verify successful conversions.
Step 2: Design Planning
The visual design should immediately communicate the tool’s privacy-first nature and offline image converter javascript capabilities. A gradient hero section at the top establishes visual hierarchy and modern aesthetics.
Place a prominent badge or label stating “All processing happens locally” or “No uploads • 100% private” in the hero area. This addresses the primary user concern about data privacy and differentiates the tool from server-based alternatives.
Design the dropzone as a card-style component with clear drag-and-drop indicators: dashed borders, upload icon, and instructional text (“Drag images here or click to browse”). The card design creates visual separation and focus.
Use subtle visual cues like lock icons or shield badges to reinforce the privacy message throughout the interface. Keep the overall design clean and minimal to avoid overwhelming users with technical complexity.
Step 3: Core Pipeline Architecture
The conversion process follows a three-step pipeline that handles all image format transformations: decode the input image, draw it to a canvas, and encode to the target format. Understanding this architecture is essential for implementing html5 canvas image convert download functionality.
Step one uses createImageBitmap to decode the input file. This modern API handles various formats automatically and crucially applies createImageBitmap exif rotation without additional code. Many images from cameras and phones contain EXIF orientation metadata that must be respected to display correctly.
Step two draws the decoded bitmap onto a canvas element using drawImage. This is where resizing occurs: set canvas dimensions to target width/height, then draw the source image scaled to fill those dimensions. The canvas now holds pixel data in a format-agnostic state.
Step three encodes the canvas content using canvas.toBlob. This method accepts three parameters: a callback receiving the binary Blob, the MIME type (like “image/jpeg” or “image/webp”), and quality (0.0 to 1.0 for lossy formats). The Blob becomes the downloadable converted image.
This pipeline cleanly separates concerns: createImageBitmap handles complex decoding, Canvas provides a universal intermediate representation, and toBlob handles encoding with compression options.
Step 4: Write Basic Convert Function
The core convert function orchestrates the three-step pipeline with special handling for format-specific requirements. JPG conversion requires particular attention because the format does not support transparency—a common source of conversion artifacts.
Create a canvas element and set its dimensions to the target size (original dimensions unless resizing is specified). Get the 2D rendering context to enable drawing operations.
For JPG output specifically, fill the entire canvas with white before drawing the image. Use ctx.fillStyle = '#FFFFFF' and ctx.fillRect(0, 0, width, height). This prevents transparent areas from rendering as black, which is the default behavior when canvas transparency encounters a format that doesn’t support it.
Decode the input file with createImageBitmap(file, { imageOrientation: 'from-image' }). The option ensures EXIF rotation is applied automatically. Draw the bitmap to canvas with ctx.drawImage(bitmap, 0, 0, width, height).
Finally, encode with canvas.toBlob(callback, mimeType, quality). The callback receives the output Blob for download. This function handles all supported formats with the JPG transparency fix preventing visual artifacts.
Step 5: Single-File Convert and Download
Complete the workflow by implementing the download mechanism that delivers converted images to the user. This creates the full conversion and download cycle for a single image.
After the convert function produces a Blob via toBlob, create a temporary download URL using URL.createObjectURL(blob). This generates a special blob: URL that references the binary data in memory.
Create an anchor element programmatically with document.createElement('a'). Set its href to the blob URL and its download attribute to the desired filename (original name with new extension, like “photo.jpg” → “photo.png”).
Trigger the download by calling link.click() on the anchor element. The browser immediately presents the download dialog or automatically saves the file based on user settings.
Clean up the temporary URL with URL.revokeObjectURL(blobUrl) after a short delay to free memory. This completes the single-file conversion workflow, providing instant results without any server interaction.
Why Choose Client-Side Over Server-Side Conversion
When building an image converter, the fundamental architectural decision is whether to process images on the server or in the browser. This choice affects privacy, cost, performance, and user experience.
Server-side processing requires users to upload images, which raises immediate privacy concerns for sensitive content. Medical images, personal photos, or confidential documents leave the user’s device and traverse the internet. Many users are rightfully hesitant to upload such content to unknown servers.
The chosen client-side image conversion approach eliminates these concerns entirely. Files never leave the user’s device. All processing happens in the browser using native APIs. This is not just a privacy feature—it’s a trust-building proposition that removes a major adoption barrier.
Cost is another decisive factor. Server-side conversion requires hosting infrastructure, bandwidth for uploads and downloads, processing compute resources, and storage for temporary files. These costs scale with usage. Client-side conversion has zero hosting cost beyond serving static HTML and JavaScript files, which can be done through free CDN services.
Performance characteristics differ significantly. Server-side conversion introduces network latency for uploads and downloads, plus queuing time if the server is busy. Client-side conversion begins instantly when the user selects a file and completes as fast as the device can process—typically within seconds for modern hardware.
The browser approach works offline completely once the page is loaded. Users can convert images on flights, in areas with poor connectivity, or in environments where uploading is restricted. This capability is impossible with server-dependent architectures.
The trade-off is browser API limitations. Not all formats are universally supported (AVIF and HEIC have varying browser support), processing speed depends on user hardware, and very large images may cause performance issues. However, for the vast majority of use cases, these limitations are acceptable given the privacy, cost, and convenience advantages.
Common Issues and Solutions
The most frequent issue when implementing a browser image converter with Canvas API is black backgrounds appearing in converted JPG images that had transparent areas in their original format.
Problem: Transparent areas in JPG conversion appear black
When converting a PNG with transparency to JPG format, transparent regions render as solid black instead of white or another expected color. This creates visually jarring results, especially for logos or graphics designed with transparency.
The root cause is that JPG format fundamentally does not support an alpha channel (transparency). When Canvas encodes to JPG via toBlob, it must decide how to render transparent pixels. The default behavior treats them as fully transparent black (RGBA 0,0,0,0), which becomes opaque black (RGB 0,0,0) in the JPG output.
The solution is to fill the canvas with white (or another chosen background color) before drawing the image. Add these lines immediately after getting the canvas context and before calling drawImage:
ctx.fillStyle = '#FFFFFF';
ctx.fillRect(0, 0, canvas.width, canvas.height);
This creates a white background layer. When the image with transparency is drawn on top, transparent areas show white instead of black. For most use cases—product photos, documents, screenshots—white is the expected and natural background color. If designing for dark themes or specific branding, use a different hex color in fillStyle.
Implement this fix conditionally: only apply the white fill when the target format is JPG (MIME type “image/jpeg”). PNG and WebP conversions should skip this step to preserve transparency correctly.
Extending Your Image Converter
- Add batch conversion UI that processes multiple files simultaneously and displays progress indicators for each image in the queue
- Implement format-specific compression presets (like “High quality” at 95%, “Web optimized” at 80%, “Maximum compression” at 60%) for user convenience
- Add aspect ratio lock toggles and common preset dimensions (Instagram 1:1, YouTube thumbnail 16:9, profile picture 1:1) for social media workflows
- Implement before/after preview panels showing original and converted images side-by-side with zoom and pan controls
- Add metadata preservation options to retain or strip EXIF data based on user privacy preferences
- Create conversion profiles that save frequently-used format/quality/size combinations for one-click reuse
- Implement drag-and-drop reordering in batch conversion lists to control processing priority
- Add browser capability detection to show warnings when the user’s browser doesn’t support certain output formats like AVIF
Frequently Asked Questions
Does the browser image converter work with all image formats?
The converter works with formats supported by the browser’s native APIs. JPG, PNG, WebP, and BMP have universal support across modern browsers. AVIF support is available in Chrome, Edge, and Opera but not Safari or Firefox on iOS. HEIC reading requires Safari or Chrome on iOS/macOS. The converter should detect browser capabilities and show format availability to users.
Are there file size limits for client-side image conversion?
Browser memory is the primary constraint. Most modern browsers can handle images up to 50-100MB without issues. Very large images (200MB+) may cause slowdowns or browser tab crashes on older devices. Canvas dimensions have browser-specific limits, typically 4096×4096 to 8192×8192 pixels, which affects maximum resolution support.
How does createImageBitmap handle EXIF rotation automatically?
When you pass { imageOrientation: 'from-image' } as the second parameter to createImageBitmap, the API reads EXIF orientation metadata and rotates the decoded image automatically. This prevents sideways or upside-down photos from cameras that rely on orientation tags rather than physically rotating pixel data.
Can I control the compression quality for PNG output?
No, PNG is a lossless format, so the quality parameter in canvas.toBlob is ignored for “image/png” MIME type. The browser always produces full-quality PNG output. To reduce PNG file sizes, you must decrease dimensions rather than quality, or convert to a lossy format like JPG or WebP where quality adjustment is available.
Why choose Canvas API over other image processing libraries?
Canvas API is built into every modern browser with no external dependencies, resulting in zero bundle size overhead and no version management. It provides native-speed performance and works offline immediately. Third-party libraries may offer more advanced features but add download size, maintenance burden, and potential security concerns. For format conversion and basic manipulation, Canvas API is the optimal choice.
Does the converter preserve image metadata like GPS location or camera settings?
No, the Canvas pipeline strips all metadata during the decode-to-canvas-to-encode process. Only pixel data transfers to the output image. This is actually a privacy feature, preventing accidental exposure of location data or device information. If metadata preservation is required, use the Exif.js library to read metadata from the original file and re-inject it into the output Blob using a library like piexifjs.
Next Steps
- Implement the full UI with drag-and-drop handlers, format selectors, and quality sliders to create a complete user experience
- Add batch conversion logic to process multiple images in sequence with progress tracking and error handling per file
- Implement format-specific optimizations and fallbacks for browsers that don’t support modern formats like AVIF or HEIC input
- Add comprehensive error handling for edge cases like corrupted files, unsupported formats, and browser memory limits
- Deploy the converter as a static site on platforms like Netlify, Vercel, or GitHub Pages for instant global availability
- Enhance accessibility with keyboard navigation, screen reader labels, and clear status announcements during conversion
You now understand the architecture and implementation of a browser image converter with Canvas API that runs entirely client-side with full privacy preservation. This foundation enables building production-ready tools that handle image format conversion, quality adjustment, and resizing without any server infrastructure or user data upload concerns.
Enjoyed this article?