
How to Build a Client Side JavaScript Image Watermark Tool with Canvas API (6_Steps)
Focus keyword: client side javascript image watermark tool
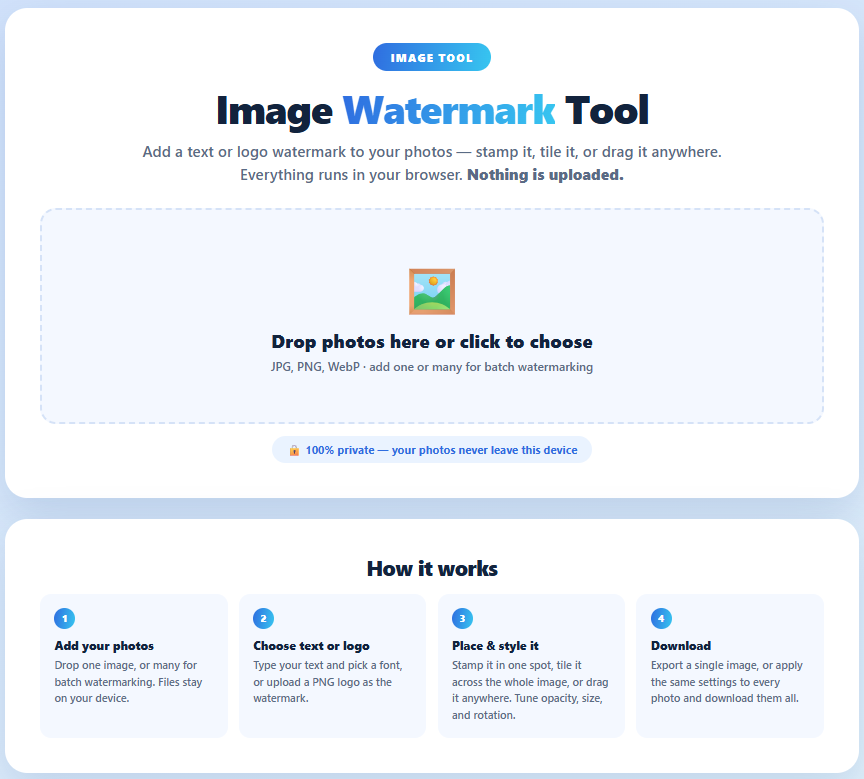
In this tutorial you will build a client side JavaScript image watermark tool that applies customizable text or logo watermarks to images entirely in the browser. No server uploads, no privacy concerns, and no hosting costs—just pure JavaScript, the Canvas API, and the File API working together to load, watermark, and export images at full resolution on the user’s device. You can see the finished result in action at the free Image Watermark tool on Tech Insight.


By the end of this step-by-step guide, you’ll have a working single-page app that lets users drag in photos, type custom watermark text, adjust opacity and rotation, choose between single-stamp or tiled layouts, optionally add a logo, flip it horizontally or vertically, and download the watermarked image in JPEG, PNG, or WebP format—all without a single byte leaving their machine.
What Is a Client-Side Image Watermark Tool?
A client side image watermark tool is a browser-based application that adds text or logo overlays to images using JavaScript and the HTML5 Canvas API, processing everything locally on the user’s device. Unlike traditional server-side watermarking services, a client side watermark tool never uploads your images to a remote server, so your photos remain private and secure.
Common use cases include:
- Photographers protecting portfolio images with copyright stamps
- Bloggers branding social media graphics with logos
- E-commerce sellers adding store names to product photos
- Students and educators marking assignment screenshots
- Indie creators batch-watermarking dozens of files offline
Who This Tutorial Is For
This guide is designed for:
- Front-end developers who want to learn practical Canvas API techniques
- Indie hackers building privacy-first tools without backend infrastructure
- Bloggers and content creators seeking a customizable watermark workflow
- Students learning intermediate JavaScript, async/await, and browser APIs
You should be comfortable with JavaScript fundamentals, including functions, event listeners, and async/await syntax. No prior Canvas or File API experience is required—we’ll explain each concept as we go.
Technologies We’ll Use
- Canvas API — The 2D drawing surface that lets us composite images, render text with custom fonts and opacity, apply transformations like rotation and scaling, and export the final result as a high-quality image blob.
- File API — Enables reading user-selected files from disk without uploading them, creating local blob URLs that the browser can load as Image sources while keeping data entirely offline.
- URL.createObjectURL — Generates temporary local URLs for File and Blob objects, allowing instant image preview and download without server round-trips or base64 encoding overhead.
- Image constructor — A JavaScript object that decodes image files into raster data the Canvas can draw, providing width and height properties at native resolution for quality preservation.
- Blob and toBlob — Binary large object representations that let us export canvas pixels as JPEG, PNG, or WebP files with adjustable quality and trigger browser downloads via anchor elements.
Building the Client Side JavaScript Image Watermark Tool
We’ll build the watermark tool in six practical steps, starting with the HTML structure and progressing through image loading, text rendering, positioning and rotation, logo support with flipping, and finally exporting and batch downloads. Each step adds a new capability while keeping the code modular and easy to extend.
Step 1: Create the HTML Structure
First, set up a minimal HTML page with a file input for choosing images, a canvas element for the preview, text and opacity controls, and a download button. This structure gives users all the interactive elements they need to add a watermark to an image in the browser.
The fileInput accepts any image format, the canvas will display the watermarked result, and the range slider lets users adjust transparency from 5% to 100%. We’ll connect these elements to JavaScript event listeners in the next steps.
<!DOCTYPE html> <html lang="en"> <head> <meta charset="UTF-8"> <meta name="viewport" content="width=device-width, initial-scale=1.0"> <title>Image Watermark Tool</title> </head> <body> <h1>JavaScript Image Watermark</h1> <input type="file" id="fileInput" accept="image/*"> <label>Text: <input type="text" id="wmText" value="© Your Name"></label> <label>Opacity: <input type="range" id="opacity" min="5" max="100" value="55"></label> <canvas id="canvas"></canvas> <button id="downloadBtn">Download image</button> <script src="watermark.js"></script> </body> </html>Step 2: Load the Image with the File API
When the user selects a file, we use the File API to read it without uploading. We create a blob URL with URL.createObjectURL and assign it to an Image object’s src. Once the image loads, we size the canvas to the photo’s native resolution—this is critical for exporting at full quality rather than a scaled-down preview size.
The img.naturalWidth and img.naturalHeight properties give us the original pixel dimensions, which we assign directly to canvas.width and canvas.height. This file API image loading JavaScript pattern is faster than FileReader and keeps the file on the user’s device as a local blob URL.
const fileInput = document.getElementById('fileInput'); const canvas = document.getElementById('canvas'); const ctx = canvas.getContext('2d'); let baseImage = null; fileInput.addEventListener('change', (e) => { const file = e.target.files[0]; if (!file) return; const img = new Image(); img.onload = () => { baseImage = img; canvas.width = img.naturalWidth; // keep full resolution canvas.height = img.naturalHeight; render(); }; img.src = URL.createObjectURL(file); // no upload — a local blob URL });Step 3: Draw a Text Watermark
The render function orchestrates the drawing: first the photo, then the watermark on top. We size the font as a percentage of the image width (8% in this example) so the watermark scales proportionally on any resolution, from phone snapshots to high-res DSLR exports.
To ensure the text is readable on any background, we draw it twice—first a dark outline with strokeText, then white fill with fillText. The ctx.save() and ctx.restore() calls isolate the watermark’s opacity and transformations so they don’t affect the base image. This is the core of any JavaScript Canvas watermark tutorial.
function render() { if (!baseImage) return; const W = canvas.width, H = canvas.height; ctx.clearRect(0, 0, W, H); ctx.drawImage(baseImage, 0, 0, W, H); // 1. the photo drawTextWatermark(W, H); // 2. the watermark } function drawTextWatermark(W, H) { const text = document.getElementById('wmText').value; const opacity = document.getElementById('opacity').value / 100; const size = W * 0.08; // 8% of image width ctx.save(); ctx.globalAlpha = opacity; ctx.font = `700 ${size}px Arial, sans-serif`; ctx.textAlign = 'center'; ctx.textBaseline = 'middle'; ctx.translate(W / 2, H / 2); // centered for now // outline first, then fill, so the text pops on any background ctx.lineWidth = size * 0.08; ctx.strokeStyle = 'rgba(0, 0, 0, 0.6)'; ctx.lineJoin = 'round'; ctx.strokeText(text, 0, 0); ctx.fillStyle = '#ffffff'; ctx.fillText(text, 0, 0); ctx.restore(); }Each time the user changes the text input or opacity slider, call render() again to repaint the canvas with the new settings. For a smooth experience, attach an input event listener to both controls that triggers the render function.
Step 4: Position, Rotate, and Tile the Watermark
Instead of hard-coding the watermark at the center, store position as fractional coordinates (0 to 1) so posX = 0.5, posY = 0.5 means center, posX = 0.9, posY = 0.9 means bottom-right, and so on. Multiply these fractions by canvas width and height to get pixel coordinates. Rotation is specified in degrees and converted to radians for ctx.rotate.
// posX / posY are 0..1 (0.5, 0.5 = center); rotation is in degrees ctx.translate(posX * W, posY * H); ctx.rotate(rotation * Math.PI / 180);For a tiled watermark that covers the entire image—useful to prevent cropping or cloning—we draw the text repeatedly in a grid pattern. The drawTiled function calculates the diagonal span of the canvas, rotates the coordinate system, then loops over rows and columns, calling a paintOne callback at each position. This technique is the foundation of batch watermark download JavaScript workflows that stamp dozens of images consistently.
function drawTiled(W, H, unitW, unitH, angle, paintOne) { const diag = Math.sqrt(W * W + H * H); // cover the rotated area const stepX = unitW * 1.6; const stepY = unitH * 2.4; ctx.save(); ctx.translate(W / 2, H / 2); ctx.rotate(angle * Math.PI / 180); for (let y = -diag / 2; y <= diag / 2; y += stepY) { for (let x = -diag / 2; x <= diag / 2; x += stepX) { ctx.save(); ctx.translate(x, y); paintOne(); // draws one text/logo unit ctx.restore(); } } ctx.restore(); }Step 5: Add a Logo Watermark and Flipping
Logo watermarks work the same way as text, except we use ctx.drawImage to paint a pre-loaded PNG or SVG image. Size the logo as a percentage of the canvas width (25% in this example) and preserve its aspect ratio by calculating height from the logo’s natural dimensions.
Horizontal and vertical flipping are achieved with ctx.scale(-1, 1) for horizontal and ctx.scale(1, -1) for vertical. Combine both for a 180° rotation effect. Remember to adjust the draw coordinates to -w/2, -h/2 so the logo stays centered after scaling.
function drawLogo(W, H, logo, opacity, flipH, flipV) { const w = W * 0.25; // 25% of image width const h = w * (logo.height / logo.width); // preserve aspect ratio ctx.save(); ctx.globalAlpha = opacity; ctx.translate(posX * W, posY * H); ctx.scale(flipH ? -1 : 1, flipV ? -1 : 1); ctx.drawImage(logo, -w / 2, -h / 2, w, h); ctx.restore(); }Load the logo image once at page load with another Image object, and reuse it in every render call. You can let users upload their own logo using a second file input, applying the same File API pattern from Step 2.
Step 6: Export and Batch-Download
To export canvas image blob for download, call canvas.toBlob with the desired MIME type and quality. The quality parameter (0 to 1) controls JPEG and WebP compression; omit it or use 1.0 for PNG. Create a temporary anchor element, assign the blob URL to its href, set a filename in download, and programmatically click it to trigger the browser’s save dialog.
document.getElementById('downloadBtn').addEventListener('click', () => { canvas.toBlob((blob) => { const a = document.createElement('a'); a.href = URL.createObjectURL(blob); a.download = 'watermarked.jpg'; a.click(); URL.revokeObjectURL(a.href); }, 'image/jpeg', 0.92); // format + quality (0..1) });For batch processing, loop over an array of files, render each one to an off-screen canvas (or reuse the visible canvas), convert it to a blob, and queue the download. Use async/await and a short setTimeout delay between downloads so the browser doesn’t block multiple save prompts. This batch watermark download JavaScript approach scales to dozens of images without freezing the UI.
async function downloadAll(files) { for (const file of files) { const blob = await watermarkFile(file); // returns a Blob const a = document.createElement('a'); a.href = URL.createObjectURL(blob); a.download = file.name.replace(/\.[^.]+$/, '') + '-watermarked.jpg'; a.click(); await new Promise(r => setTimeout(r, 350)); // let each save queue } }One gotcha: if you’re exporting JPEG and your canvas has transparent pixels, they’ll render as black. Fix this by filling the canvas with white before drawing the base image whenever the user selects JPEG format.
if (format === 'image/jpeg') { ctx.fillStyle = '#ffffff'; ctx.fillRect(0, 0, canvas.width, canvas.height); }Single vs Tiled Watermarks: Choosing the Right Approach
Offering both single-stamp and tiled watermark modes gives users flexibility for different use cases. A single watermark placed in a corner or center is clean, unobtrusive, and perfect for branding social media posts or portfolio previews where you want the photo to shine. However, a determined person can crop or clone-stamp it out in seconds.
A tiled watermark covers the entire image with repeated text or logos at a diagonal angle, making removal nearly impossible without destroying the photo. This approach is ideal for stock photography, pre-sale product images, or any scenario where you need strong protection against unauthorized use. The tradeoff is that heavy tiling can distract from the image content, so keep opacity low (20–40%) and spacing generous.
In your client side JavaScript image watermark tool, implement both as separate functions and let users toggle between them with a radio button or checkbox. The tiling algorithm from Step 4 handles rotation and coverage automatically, so adding the option is just a few lines of code.
Common Issues and Solutions
Exported JPEG has a black background. JPEG does not support transparency, so any transparent canvas pixels encode as black. Before drawing the base image, check if the selected format is image/jpeg and fill the canvas with white using ctx.fillRect(0, 0, canvas.width, canvas.height) and ctx.fillStyle = '#ffffff'.
Fonts look different on other devices. The Canvas API can only render fonts installed on the user’s system. If you specify font-family: 'MyCustomFont' and it’s missing, the browser falls back to a default. Stick to widely available fonts like Arial, Helvetica, or Georgia with a sans-serif or serif fallback. Alternatively, load a web font and wait for document.fonts.ready before rendering.
Large images feel sluggish. Painting a 6000×4000 pixel canvas at full resolution on screen can be slow. Keep the canvas at native resolution for export quality, but scale it down visually with CSS max-width: 100% so the browser only displays a scaled-down version. The actual pixel data remains high-resolution for the download.
Testing from file:// fails. Modern browsers restrict File API and other features on file:// pages for security reasons. Run a local HTTP server instead—navigate to your project folder in a terminal and run the command below, then open http://localhost:8000 in your browser.
python -m http.server 8000Extending Your Watermark Tool
Once you have the core functionality working, consider these optional enhancements:
- Font picker — Add a dropdown menu of web-safe fonts or integrate Google Fonts, waiting for
document.fonts.readybefore rendering to ensure custom fonts load. - LocalStorage presets — Save user’s favorite text, opacity, position, and rotation settings in
localStorageso they persist across sessions, speeding up repeat workflows. - Drag-and-drop upload — Replace the file input with a drag-and-drop zone by listening to
dragoveranddropevents on the document body, making bulk uploads faster. - Color picker for text — Let users choose watermark color with an
<input type="color">control instead of hard-coding white, useful for matching brand colors. - Shadow and glow effects — Use
ctx.shadowColor,ctx.shadowBlur, andctx.shadowOffsetX/Yto add drop shadows or glows that improve readability on complex backgrounds. - Undo/redo stack — Store canvas snapshots in an array and redraw from history when the user clicks undo or redo buttons.
Frequently Asked Questions
Can I watermark videos with this tool?
Not directly—this tutorial focuses on static images. Video watermarking requires the MediaRecorder API or a library like FFmpeg.js to process frames, which is significantly more complex and CPU-intensive. Stick to images for client-side performance.
Does the watermark reduce image quality?
Only if you export at a low JPEG quality setting. By keeping the canvas at native resolution and using a quality parameter of 0.90 or higher in toBlob, the watermarked image is visually identical to the original. PNG and WebP exports with quality 1.0 are lossless.
How do I handle HEIC or other uncommon formats?
Browsers can only decode formats they natively support (JPEG, PNG, GIF, WebP, and sometimes AVIF). For HEIC or RAW files, you need a JavaScript decoder library like heic2any to convert the file to JPEG or PNG before loading it into the Image object.
Can I use this tool offline?
Yes—once the HTML and JavaScript files are saved locally, the entire client side watermark tool works without an internet connection. Package it as a progressive web app with a service worker for true offline functionality.
Is there a file size limit?
The limit is your device’s available memory. Modern browsers can handle images up to several thousand pixels on each side, but very large files (50+ megapixels) may cause slowdowns or crashes on low-end devices. Consider adding a file size check and warning users about large uploads.
How do I add a QR code watermark?
Generate the QR code with a library like qrcode.js, which outputs a canvas or data URL. Load that output as an Image and draw it onto your main canvas using the same ctx.drawImage technique from Step 5.
Next Steps
You’ve now built a fully functional client side JavaScript image watermark tool that loads images with the File API, draws customizable text and logo watermarks with the Canvas API, applies rotation and tiling, adjusts opacity, and exports high-quality results in multiple formats—all without a single server round-trip.
- Test your tool with photos of varying resolutions and aspect ratios to ensure consistent results
- Experiment with tiled watermarks at different angles to find the best balance between protection and aesthetics
- Add the optional extensions like font pickers and localStorage presets to streamline your workflow
- Share your tool with friends or deploy it as a free utility for your blog or portfolio
For inspiration and to see all these techniques in action, explore the Image Watermark tool on Tech Insight. With your new client side JavaScript image watermark tool, you can protect and brand your images instantly, privately, and at zero hosting cost—right in the browser.
Enjoyed this article?