
Creating a Basic JavaScript Image Converter Using AI in the Browser
Focus keyword: javascript image converter
If you’ve ever wanted to build a tool that converts images between formats—or even applies AI-powered enhancements—right in the browser, you’re in the right place. This tutorial will show you how to create a javascript image converter that runs entirely client-side, using HTML5 Canvas for format conversion and TensorFlow.js for AI capabilities. No backend required, no server costs, and your users’ images never leave their device.
By the end of this guide, you’ll have a working single-page application that loads images, converts them between formats like PNG, JPEG, and WebP, and applies a basic AI feature—all with JavaScript code you can copy and test immediately.
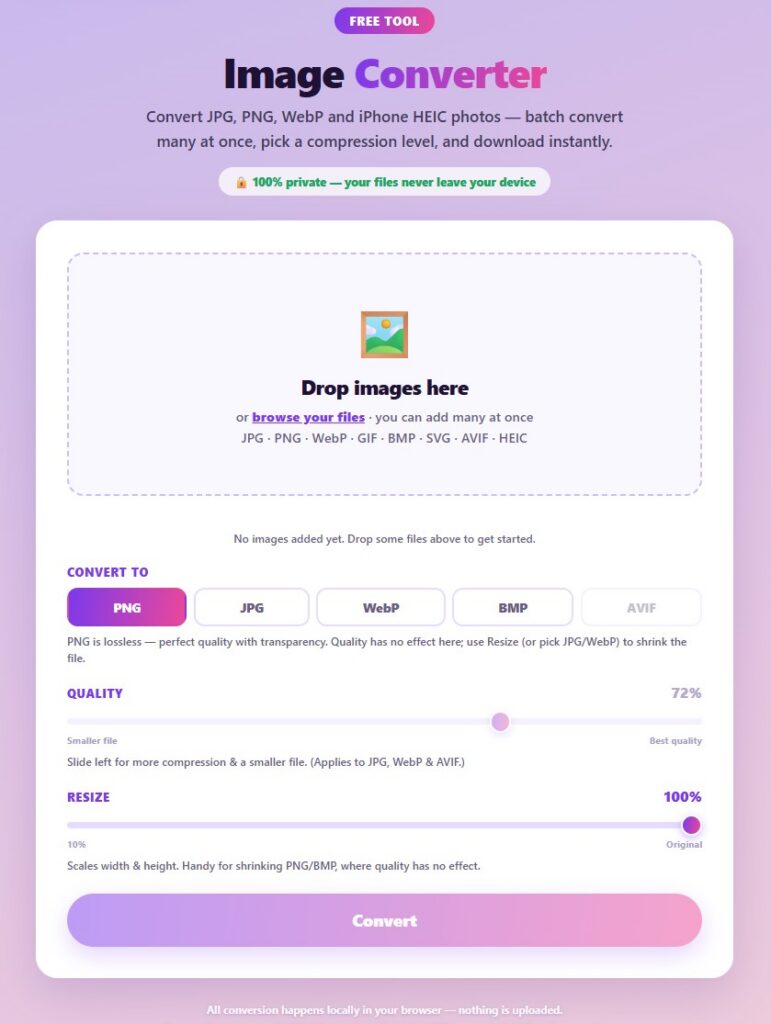
Completed application :
What Is a JavaScript Image Converter?
A JavaScript image converter is a browser-based tool that transforms images from one format to another (for example, converting a PNG to a JPEG or WebP) using client-side code. Unlike server-based converters that upload your images to a remote service, a client side image converter processes everything locally in your browser using the Canvas API and File API.
When you add AI capabilities—such as image classification, enhancement, or style effects—using libraries like TensorFlow.js, you create an in-browser image converter javascript tool that’s both powerful and privacy-friendly.
Real-world use cases include:
- Converting screenshots or photos to smaller file sizes for web use
- Batch processing images without uploading to third-party services
- Adding AI-powered image classification or effects to your web apps
- Learning core browser APIs and AI integration patterns
Who This Tutorial Is For
This tutorial is designed for:
- Developers with basic HTML, CSS, and JavaScript knowledge
- No-code builders curious about adding custom image tools to their projects
- Anyone who wants to understand how AI image processing tutorial concepts work in practice
You don’t need Node.js, build tools, or complicated setup. Everything runs in a single HTML file you can open in your browser.
Technologies We’ll Use
For the latest official details, see TensorFlow.js.
For the latest official details, see File API.
For the latest official details, see Canvas API.
We’ll combine three core web technologies:
Canvas API – The HTML5 <canvas> element and its 2D rendering context let us draw, manipulate, and export images in different formats. Methods like drawImage(), toDataURL(), and toBlob() handle the actual conversion work.
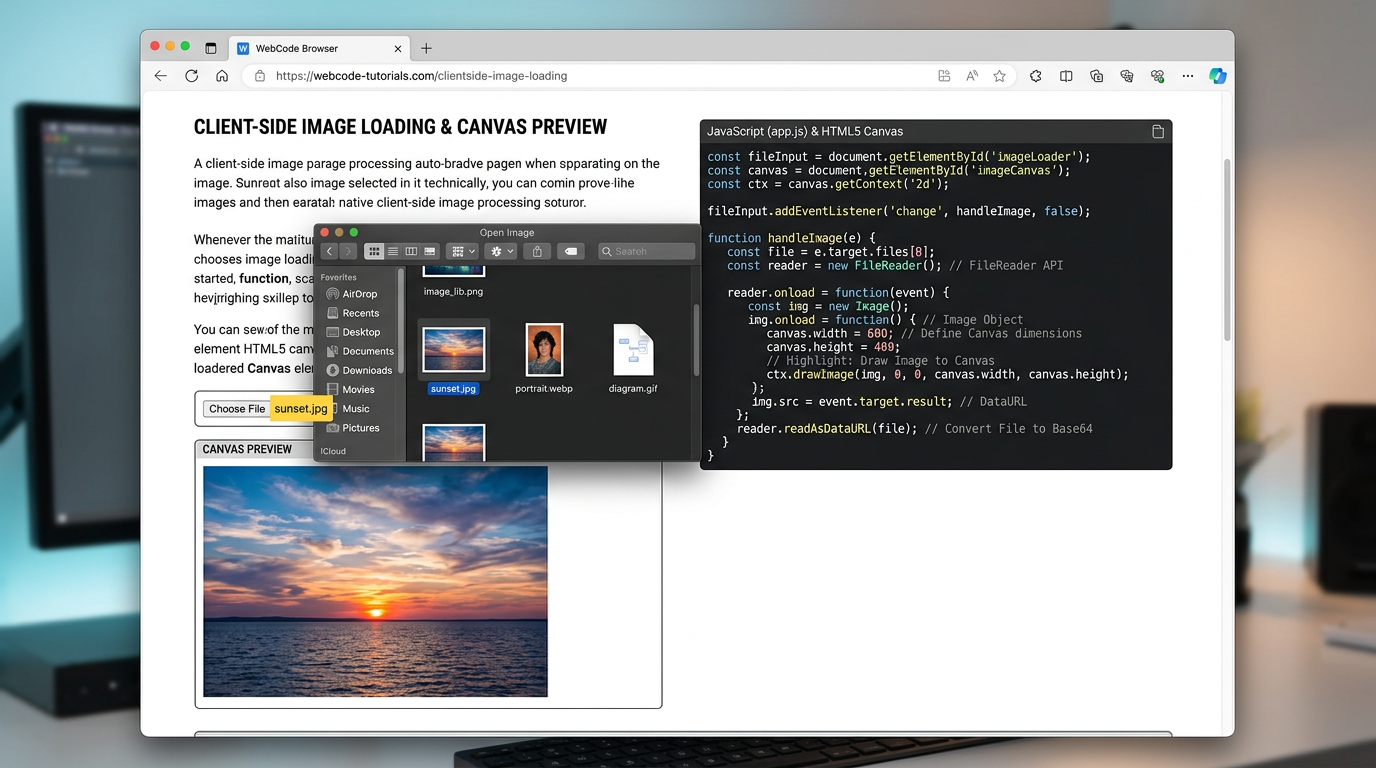
File API – The FileReader interface loads images selected by users through an <input type="file"> element, turning them into data URLs we can display and process.
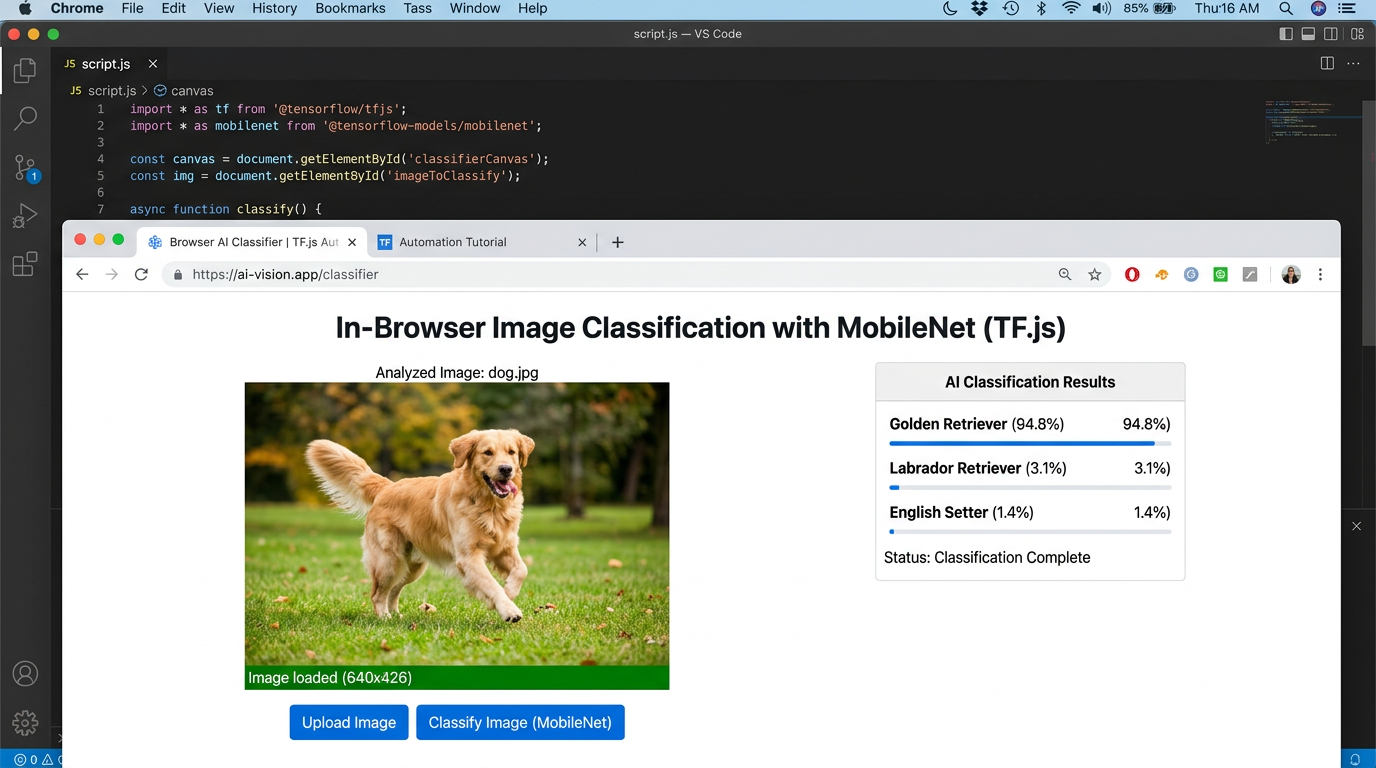
TensorFlow.js – Google’s official JavaScript ML library runs pre-trained models directly in the browser using WebGL and WebAssembly for acceleration. We’ll use a simple image classification model to demonstrate AI integration without requiring any training or API keys.
All three technologies are supported by modern browsers (Chrome, Edge, Firefox, Safari, Opera) and work without authentication or accounts.
Building Your JavaScript Image Converter
Step 1: Create the HTML Structure
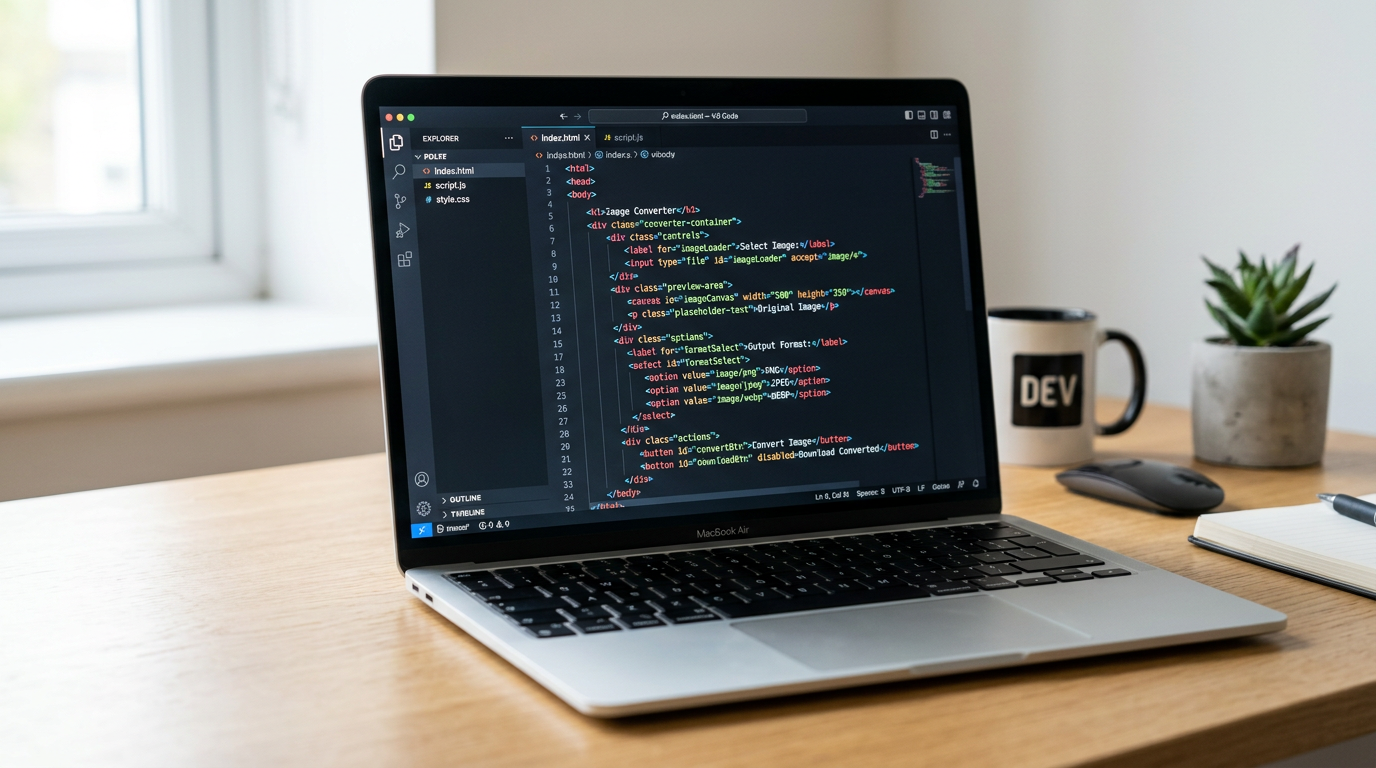
Start with a simple HTML page that includes a file input, a canvas to display images, format selection controls, and buttons for conversion and download:
<!DOCTYPE html>
<html lang="en">
<head>
    <meta charset="UTF-8">
    <meta name="viewport" content="width=device-width, initial-scale=1.0">
    <title>AI Image Converter</title>
    <style>
        body { font-family: Arial, sans-serif; max-width: 800px; margin: 50px auto; padding: 20px; }
        canvas { max-width: 100%; border: 1px solid #ddd; margin: 20px 0; }
        button { padding: 10px 20px; margin: 5px; cursor: pointer; }
        select, input { margin: 10px 0; }
        #status { color: #666; margin: 10px 0; }
    </style>
</head>
<body>
    <h1>JavaScript Image Converter with AI</h1>

    <input type="file" id="imageInput" accept="image/*">

    <div>
        <label>Convert to:
            <select id="formatSelect">
                <option value="image/png">PNG</option>
                <option value="image/jpeg">JPEG</option>
                <option value="image/webp">WebP</option>
            </select>
        </label>
        <label>Quality (JPEG/WebP):
            <input type="range" id="qualitySlider" min="0" max="100" value="90">
            <span id="qualityValue">90</span>%
        </label>
    </div>

    <canvas id="canvas"></canvas>

    <button id="convertBtn">Convert Format</button>
    <button id="classifyBtn">Classify with AI</button>
    <button id="downloadBtn" style="display:none;">Download Image</button>

    <div id="status"></div>
    <div id="aiResult"></div>

    <script src="https://cdn.jsdelivr.net/npm/@tensorflow/tfjs"></script>
    <script src="https://cdn.jsdelivr.net/npm/@tensorflow-models/mobilenet"></script>
    <script src="script.js"></script>
</body>
</html>
This structure includes the TensorFlow.js library and MobileNet (a pre-trained image classification model) via CDN. Before using these in production, check the official TensorFlow.js setup documentation for the latest CDN URLs.
Step 2: Load and Display Images with JavaScript
Create a script.js file (or add a <script> section) to handle image loading using the File API:
const imageInput = document.getElementById('imageInput');
const canvas = document.getElementById('canvas');
const ctx = canvas.getContext('2d');
const formatSelect = document.getElementById('formatSelect');
const qualitySlider = document.getElementById('qualitySlider');
const qualityValue = document.getElementById('qualityValue');
const convertBtn = document.getElementById('convertBtn');
const classifyBtn = document.getElementById('classifyBtn');
const downloadBtn = document.getElementById('downloadBtn');
const status = document.getElementById('status');
const aiResult = document.getElementById('aiResult');

let currentImage = null;
let model = null;

// Update quality display
qualitySlider.addEventListener('input', (e) => {
    qualityValue.textContent = e.target.value;
});

// Load image when user selects a file
imageInput.addEventListener('change', (e) => {
    const file = e.target.files[0];
    if (!file) return;

    const reader = new FileReader();

    reader.onload = (event) => {
        const img = new Image();
        img.onload = () => {
            currentImage = img;
            canvas.width = img.width;
            canvas.height = img.height;
            ctx.drawImage(img, 0, 0);
            status.textContent = `Image loaded: ${img.width}x${img.height}`;
            downloadBtn.style.display = 'none';
        };
        img.src = event.target.result;
    };

    reader.readAsDataURL(file);
});
This code uses FileReader.readAsDataURL() to load the selected image, then draws it onto the canvas using drawImage(). The onload event handler ensures the image is fully loaded before drawing.
Step 3: Convert Image Formats
Add format conversion using the Canvas API’s toBlob() method:
convertBtn.addEventListener('click', () => {
    if (!currentImage) {
        status.textContent = 'Please load an image first.';
        return;
    }

    const format = formatSelect.value;
    const quality = qualitySlider.value / 100;

    canvas.toBlob((blob) => {
        if (blob) {
            const url = URL.createObjectURL(blob);
            downloadBtn.onclick = () => {
                const a = document.createElement('a');
                a.href = url;
                a.download = `converted.${format.split('/')[1]}`;
                a.click();
            };
            downloadBtn.style.display = 'inline-block';
            status.textContent = `Converted to ${format.split('/')[1].toUpperCase()}. File size: ${(blob.size / 1024).toFixed(2)} KB`;
        }
    }, format, quality);
});
The toBlob() method is asynchronous and takes a callback that receives a Blob object representing the converted image. The quality parameter (0.0 to 1.0) applies only to JPEG and WebP formats.
Step 4: Add AI Image Classification
Now add the AI feature using TensorFlow.js and MobileNet to classify what’s in the image:
// Load AI model when page loads
async function loadModel() {
    status.textContent = 'Loading AI model...';
    try {
        model = await mobilenet.load();
        status.textContent = 'AI model ready.';
    } catch (error) {
        status.textContent = 'Failed to load AI model. Check your connection.';
        console.error(error);
    }
}

loadModel();

// Classify image with AI
classifyBtn.addEventListener('click', async () => {
    if (!currentImage) {
        status.textContent = 'Please load an image first.';
        return;
    }

    if (!model) {
        status.textContent = 'AI model is still loading...';
        return;
    }

    status.textContent = 'Classifying image...';

    try {
        const predictions = await model.classify(canvas);

        let resultHTML = '<h3>AI Classification Results:</h3><ul>';
        predictions.forEach(pred => {
            resultHTML += `<li>${pred.className}: ${(pred.probability * 100).toFixed(2)}%</li>`;
        });
        resultHTML += '</ul>';

        aiResult.innerHTML = resultHTML;
        status.textContent = 'Classification complete.';
    } catch (error) {
        status.textContent = 'Classification failed.';
        console.error(error);
    }
});
The MobileNet model’s classify() method analyzes the canvas and returns predictions with confidence scores. This is a practical example of basic image editing with AI—you’re using machine learning to understand image content without any training or backend infrastructure.
Understanding AI vs Format Conversion
It’s important to distinguish between two types of operations:
Format conversion (PNG to JPEG, JPEG to WebP, etc.) is a standard browser capability handled by the Canvas API. This isn’t an AI task—it’s pure image encoding.
AI-powered operations use machine learning models to analyze or enhance images in ways that require learned patterns: classification (identifying objects), style transfer, background removal, enhancement, or smart cropping. These require libraries like TensorFlow.js and pre-trained models.
Our converter demonstrates both: Canvas handles format changes, while TensorFlow.js adds AI classification. This gives you a practical foundation for building more sophisticated javascript AI image tools.
Common Issues and Solutions
For the latest official details, see WebP browser support.
CORS errors when testing locally: Browsers may block file:// URLs from loading external resources. Run a simple local server instead:
python -m http.server 8000Then open http://localhost:8000 in your browser.
Large images freeze the browser: Canvas and AI models consume significant memory. For images larger than 2000×2000 pixels, consider resizing before processing:
const maxDimension = 1000;
if (img.width > maxDimension || img.height > maxDimension) {
    const scale = maxDimension / Math.max(img.width, img.height);
    canvas.width = img.width * scale;
    canvas.height = img.height * scale;
    ctx.drawImage(img, 0, 0, canvas.width, canvas.height);
}
Model loading takes too long: MobileNet is relatively small (~16MB), but initial load over slow connections may take time. Consider showing a loading indicator and caching the model for repeated use.
WebP not working in older browsers: While WebP has broad support in modern browsers, very old versions may not support it. Check current compatibility on the Can I Use website before relying on it for production.
Extending Your Image Converter
Once you have this foundation, you can add:
- More AI features: Object detection, background removal (with models from Hugging Face), style transfer, or image segmentation using additional TensorFlow.js models or ONNX Runtime Web.
- Batch processing: Allow users to select multiple images and process them sequentially.
- Custom filters: Add brightness, contrast, or color adjustments using Canvas pixel manipulation.
- Compression controls: Fine-tune quality settings and compare file sizes.
- Format validation: Check file types and dimensions before processing.
The official TensorFlow.js models page lists many pre-trained options you can integrate. For different AI libraries, explore ONNX Runtime Web for running ONNX models, or MediaPipe for Google’s pre-built vision solutions—both documented with browser-specific guides.
Frequently Asked Questions
Do users need to be online for this to work?
The initial page load requires downloading the HTML, JavaScript, and TensorFlow.js library (including the MobileNet model). After that, all processing happens locally in the browser. With service workers, you could make it work offline after the first visit.
Is this free to use?
Yes. TensorFlow.js, MobileNet, Canvas API, and File API are free and open source. There are no API keys, accounts, or usage limits for client-side processing.
Can I use this for commercial projects?
TensorFlow.js and MobileNet have permissive open-source licenses. Check the specific license for any models or libraries you integrate, but most are suitable for commercial use.
What about privacy?
Because all processing happens in the user’s browser, images never leave their device. This is a major advantage of client-side image converters over server-based services.
Which browsers does this work in?
Modern versions of Chrome, Edge, Firefox, Safari, and Opera all support Canvas API, File API, WebAssembly, and the features needed for TensorFlow.js. For exact version requirements, consult the official browser compatibility documentation.
Next Steps
You’ve built a working javascript image converter that demonstrates both format conversion and AI-powered classification. This foundation teaches you the core browser APIs and AI integration patterns that power many modern web applications.
To continue learning:
- Experiment with other TensorFlow.js models for different AI tasks
- Explore ONNX Runtime Web to run a wider variety of models
- Add progressive enhancement with loading states and error recovery
- Build a similar tool that processes video frames using the same techniques
- Integrate this converter into a larger web app or content management workflow
The techniques you’ve learned here—Canvas manipulation, FileReader usage, and browser-based AI—apply to countless practical automation scenarios, from document processing to real-time video effects.
Now open your converted HTML file in a browser, load an image, and see your in-browser image converter javascript tool in action.
Enjoyed this article?