
How to Get API Key and Make Your First API Call: A Beginner’s Tutorial
Focus keyword: how to get API key
If you’re building automation workflows, connecting tools like n8n, or just exploring how modern apps communicate, you’ll need to understand API keys. This tutorial walks you through exactly how to get your first API key and make a successful API call—no prior experience required.
By the end of this guide, you’ll have obtained a real API key, made at least one working API request, and learned the security basics that will serve you throughout your automation journey.
▶Previous tutorial : Introduction to Claude Developer Platform: A Beginner’s Guide with Practical API Workflows
What is an API Key and Why Do You Need One?
Think of an API key like a library card. When you want to borrow books from a library, you need a card that identifies you and tracks what you’ve borrowed. Similarly, when your application wants to access data or services from another platform, it needs an API key to identify itself.
An API (Application Programming Interface) is simply a way for different software applications to talk to each other. The API key is your unique authentication credential that:
- Identifies who is making the request so the service knows who to bill or limit
- Controls access to prevent unauthorized use
- Tracks usage so providers can enforce rate limits and quotas
- Protects the service from abuse or overload
API keys typically look like long strings of random letters and numbers, such as a1b2c3d4e5f6g7h8i9j0k1l2m3n4o5p6. Some providers use the term “token” or “app ID” interchangeably with API key.
Who This Tutorial Is For
This API tutorial for beginners is designed for:
- Developers learning to integrate third-party services
- No-code builders connecting tools in platforms like n8n or Zapier
- Tech-savvy beginners exploring automation workflows
- Anyone who needs to understand the API key generation process
You don’t need coding experience to follow along, though we’ll show code examples for those who want them. The only prerequisite is basic computer literacy and an internet connection.
How to Get Your First API Key: Step-by-Step
Let’s walk through the complete process of obtaining an API key using real examples. We’ll start with the simplest option and then show you a more common authenticated workflow.

Step 1: Choose a Beginner-Friendly API
For your first experience, I recommend starting with one of these options:
Open-Meteo (Simplest Option) This free weather API requires no API key or signup for non-commercial use up to 10,000 daily calls. It’s perfect for understanding how APIs work before dealing with authentication. The data is licensed under CC BY 4.0, requiring only attribution.
OpenWeather (Authentication Practice) This established weather API platform provides a free tier and requires API key authentication—making it ideal for learning the full API key generation process. While the service uses “OpenWeather” branding, you may see legacy references to “OpenWeatherMap” in some documentation.
For this tutorial, we’ll demonstrate both approaches so you understand the difference between open and authenticated APIs.
Step 2: Sign Up for an Account (OpenWeather Example)
If you’re using Open-Meteo, skip this step—no signup required. For OpenWeather:
- Visit the official OpenWeather registration page
- Enter your email address, username, and password
- Accept the terms of service
- Check your email for a confirmation message
- Click the verification link in the email
After verification, you’ll automatically receive an API key in your welcome email and be able to access your account dashboard.
Step 3: Find and Copy Your API Key
For OpenWeather, once logged in:
- Navigate to your account page or API keys section in the dashboard
- Look for a section labeled “API Keys” or “Your API Key”
- You’ll see one or more API keys (called “APPID” in OpenWeather documentation)
- Click the copy button or manually select and copy the entire key string
The key is typically a long alphanumeric string. Make sure you copy the complete key without any extra spaces.
Important: New API keys on some platforms may take a few minutes to activate across their systems. If your first request fails, wait 10-15 minutes and try again.
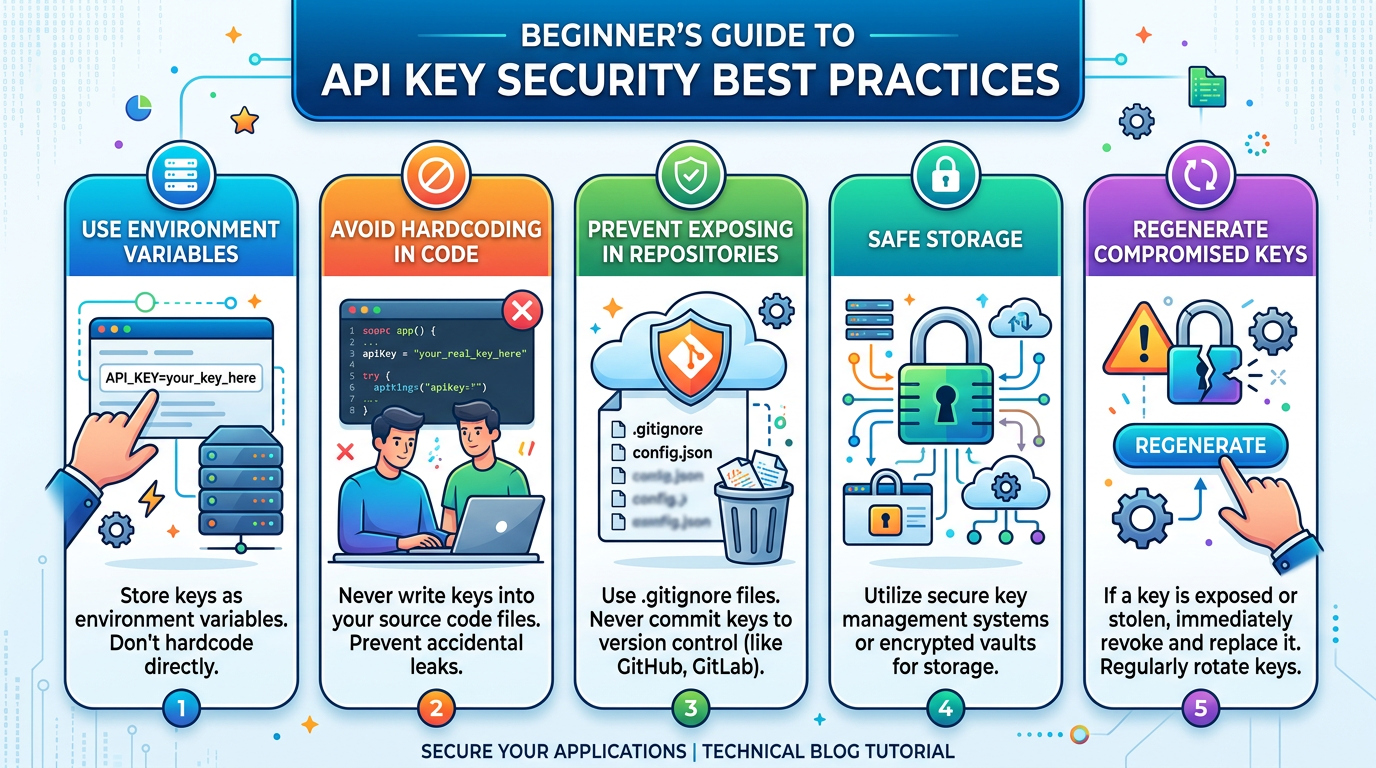
Step 4: Secure Your API Key Immediately
Before making your first API call, understand these critical security rules:
- Never commit API keys to GitHub or public repositories—automated bots scan for exposed keys within minutes
- Never share keys in screenshots, tutorials, or public forums—blur them out if demonstrating
- Use environment variables instead of hardcoding keys in your code
- Regenerate immediately if exposed—most dashboards let you create new keys instantly
Most providers allow you to generate multiple API keys and revoke compromised ones without affecting your account.
Making Your First API Call
Now for the exciting part—actually using your API key to request data. We’ll show multiple methods so you can choose what works for your workflow.

Understanding API Requests
Before we start, know that API calls typically need:
- An endpoint URL (the specific address for the data you want)
- An HTTP method (usually GET for retrieving data)
- Your API key (placed in headers, query parameters, or request body depending on the API)
- Optional parameters (to specify what data you want)
Always check the official API documentation to see exactly where the API key should be placed and what parameters are required.
Method 1: Browser Request (Open-Meteo)
The simplest possible API call requires no tools—just your web browser. Open-Meteo’s straightforward HTTP GET interface makes this easy:
https://api.open-meteo.com/v1/forecast?latitude=52.52&longitude=13.41¤t_weather=trueCopy that URL into your browser’s address bar and press Enter. You’ll see a JSON response with current weather data for Berlin. No API key needed—this demonstrates the basic request-response flow.
Method 2: Command Line with cURL
cURL is a command-line tool available by default on most modern operating systems (macOS, Linux, and Windows 10+). For OpenWeather’s authenticated API:
curl -H "Accept: application/json" "https://api.openweathermap.org/data/2.5/weather?q=London&appid=YOUR_API_KEY_HERE"Replace YOUR_API_KEY_HERE with your actual API key. The -H flag adds a header to your request, and the API key goes in the URL as a query parameter (this varies by provider).
A successful response looks like:
{
  "weather": [{"main": "Clouds", "description": "broken clouds"}],
  "main": {"temp": 280.32, "pressure": 1012},
  "name": "London"
}
Method 3: JavaScript/Node.js
For developers building automation workflows, here’s how to make the same request in JavaScript. Before following this example, check the Node.js official documentation for fetch availability—global fetch is supported in Node.js 18 and later; earlier versions may require an HTTP client package.
const apiKey = process.env.OPENWEATHER_API_KEY; // Read from environment variable
const city = 'London';

fetch(`https://api.openweathermap.org/data/2.5/weather?q=${city}&appid=${apiKey}`)
  .then(response => response.json())
  .then(data => console.log(data))
  .catch(error => console.error('Error:', error));
This example reads the API key from an environment variable rather than hardcoding it—a security best practice.
Method 4: Python
For Python automation scripts, install the requests library first using pip install requests (check the official requests documentation for the current version and compatibility):
import os
import requests

api_key = os.environ.get('OPENWEATHER_API_KEY')
city = 'London'

response = requests.get(
    f'https://api.openweathermap.org/data/2.5/weather',
    params={'q': city, 'appid': api_key}
)

print(response.json())
Method 5: Visual Tools (Postman)
If you prefer a graphical interface for testing APIs:
- Download Postman from the official website
- Create a new request
- Set the method to GET
- Enter your API endpoint URL
- Add your API key either in the Headers tab or using Postman’s built-in authentication features
- Click Send
Postman and similar tools like Insomnia are excellent for exploring APIs before integrating them into workflows. Check their official learning centers for current step-by-step instructions, as interfaces update frequently.
Understanding API Responses and Common Errors
A successful API response typically returns:
- HTTP status code 200 (success)
- JSON-formatted data containing the information you requested
- Response headers with metadata about the request
Common errors you might encounter:
401 Unauthorized Your API key is missing, invalid, or placed in the wrong location. Double-check you copied the complete key and placed it where the documentation specifies.
403 Forbidden Your API key is valid but doesn’t have permission for this endpoint, or your email isn’t verified yet.
429 Too Many Requests You’ve exceeded your rate limit. Free tiers typically have daily or per-minute quotas. Check the provider’s current pricing page for your plan’s limits—these can change, so avoid relying on outdated information.
500 Internal Server Error The API provider is experiencing issues. Wait a few minutes and try again.
Common Beginner Mistakes
Putting the API key in the wrong place Some APIs want keys in the Authorization header as documented by MDN Web Docs, others in query parameters, and some in the request body. Always read the specific API’s documentation—there’s no universal standard.
Forgetting to wait for key activation Newly generated keys on some platforms need a few minutes to propagate through their systems.
Hardcoding API keys in code Store keys in environment variables instead. The exact method varies by operating system and programming language—consult your OS documentation for shell-specific syntax and your language’s documentation for reading environment variables.
Not checking rate limits Free tiers have usage quotas. Before relying on an API, visit the provider’s official pricing page to understand current limits, which may change over time.
Exposing keys in version control Add your environment variable files (like .env) to .gitignore before your first commit.
Frequently Asked Questions
Do I need to pay to get an API key? Many providers offer free tiers that automatically generate API keys when you sign up. Always check the official pricing documentation before signing up to understand current limits and whether a credit card is required.
How many API calls can I make with a free API key? This varies significantly by provider. OpenWeather and similar services document their free tier limits on their pricing pages, but these quotas can change. Some APIs like Open-Meteo allow 10,000 daily calls for non-commercial use without any signup.
Can I use the same API key for multiple projects? Yes, though some developers generate separate keys per project for easier tracking and security. If one project’s key is compromised, you can revoke it without affecting other projects.
What happens if I lose my API key? You can always view your existing keys in the provider’s dashboard, and most platforms let you generate new keys or regenerate lost ones instantly.
Do API keys expire? Some do, some don’t. Check your provider’s documentation. Many platforms let you set expiration dates for security, while others keep keys active indefinitely unless you revoke them.
Next Steps After Your First Successful API Call
Congratulations on making your first API request! Here’s how to build on this foundation:
- Explore other endpoints in the same API to understand different data you can access
- Try other beginner-friendly APIs to practice the signup and authentication process
- Build a simple project that uses API data—like a weather dashboard or news aggregator
- Learn about API integration in automation tools like n8n, where you can connect multiple APIs visually
- Study API documentation patterns to get comfortable reading different providers’ styles
Remember that API provider dashboards, pricing structures, and authentication methods can change. Always verify current details on the official documentation and pricing pages before relying on any specific implementation details.
You now understand the complete flow: how to get an API key, where to place it in requests, and how to troubleshoot common issues. This beginner API integration skill forms the foundation for building powerful automation workflows, connecting services, and creating data-driven applications.
References
Enjoyed this article?